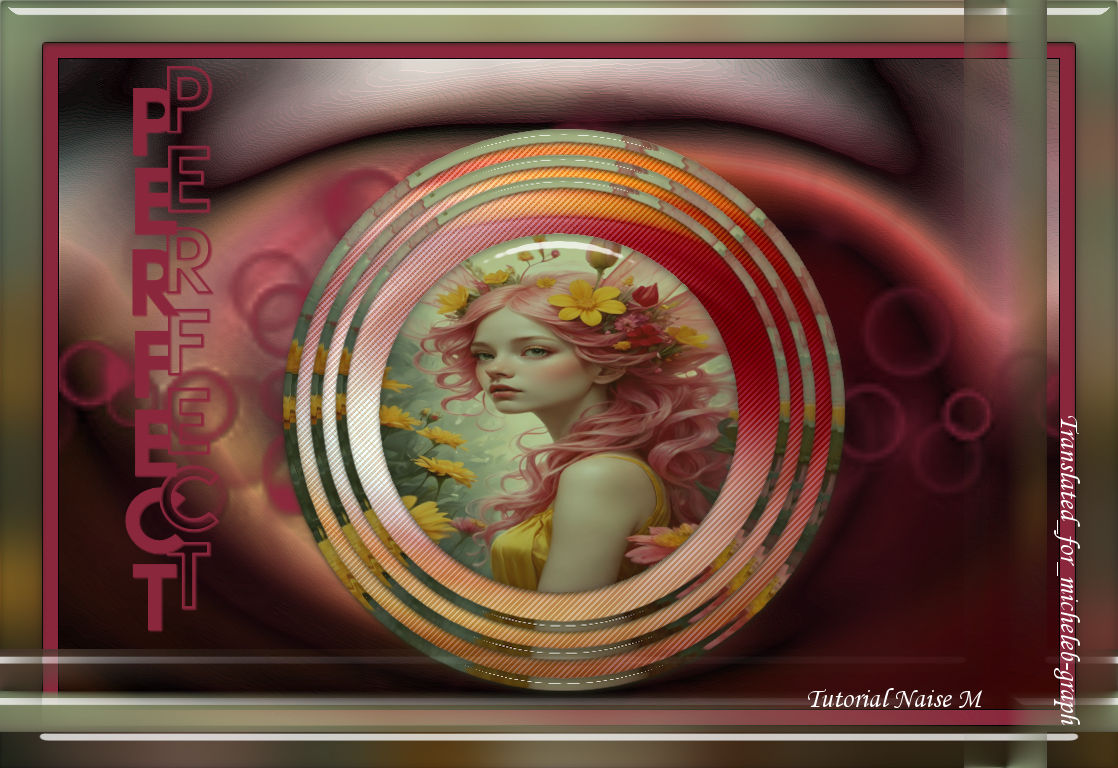
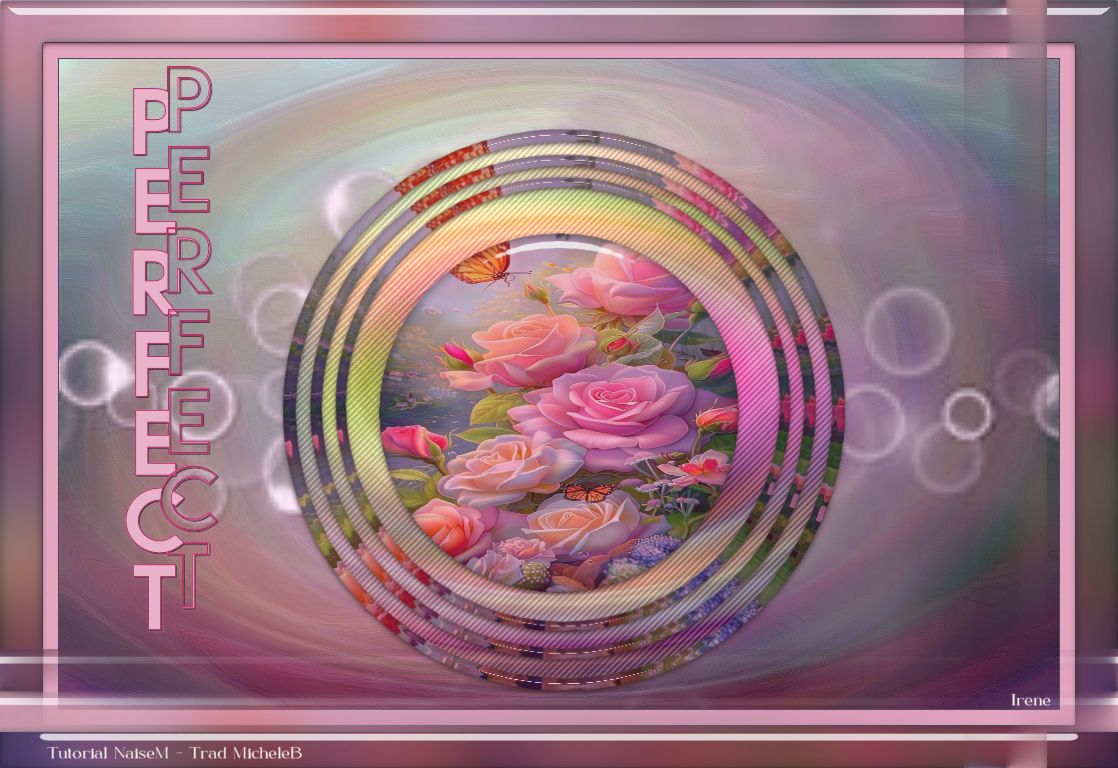
Link on image
This tutorial is the property of Naise
This translation is the property of Micheleb-graph

Material
Image in Jpg
Text tube
Alpha Layer
Preset Glass
Naise Mask

Filters
Azyzam's
1
Open alpha layer,
Alpha_perfect
Duplicat window
Close the original and work on the copy
Select all
2
Copy - paste your chosen image into the selection
You can remain selected
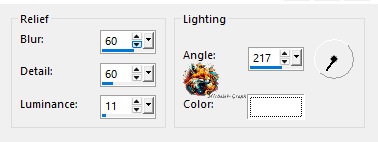
3
Radial Blur settings

4
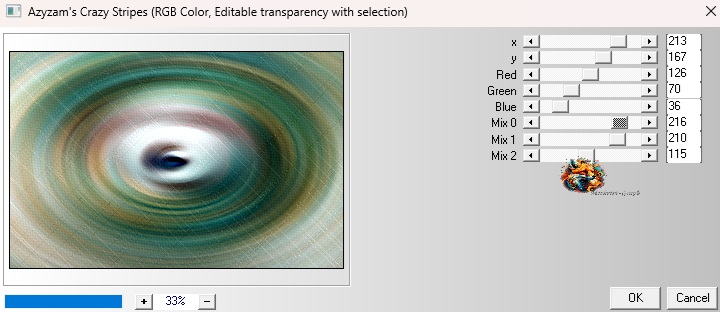
Filter - Azyzam's Crazy Stripes
5
Selection loaded from alpha layer
#perfect 1
Turn the selection into a layer
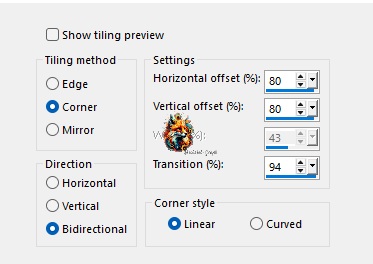
6
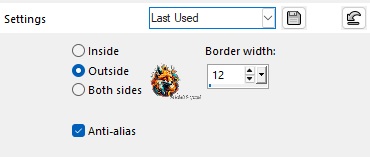
Selecting - editing - selecting borders
outside
7
New layer
Sticking in the selection, it's still in the memory
8
Filter - Eye Candy Impact - Glass
preset_perfect
Deselect
9
Duplicate layer
Image - resized to 90%, single layer
10
Layer - duplicate
Image - resized to 90% - single layer
11
Selection loaded from alpha layer
#perfect 2
12
New layer
Copy and paste your image into the selection
13
Filter - Eye Candy - Impact - Glass
In memory, same preset
Deselect
14
Merge with the layer below 4 times
15
Go to the merged layer
16
New layer
17
Choose a color
18
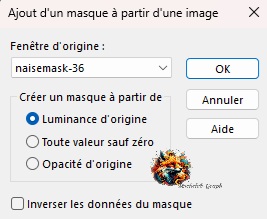
Mask layer from an image
mask naiseminas_36
Merge the group
Drop Shadow

19
Go to the merged layer again
Texture effect, plastic molding
20
Image - add a border of
1 px of black
15 px of a chosen color
1 px of blac
42 px of white
21
Select the 42 px border with the magic wand
paste in the selection (your image is still in memory)
22
Settings, gaussian blur at 30
Filter - Eye Candy - Impact - Glass
In memory
Turn the selection into a layer
Deselect
23
Seamless mosaic image effect
diagonal stuttering
24
Copy and paste texte tube
Colorize
25
Layer placement
26
Sign - merge and save as Jpg
Version of my tester
Gallery Index

Ce(tte) œuvre est mise à disposition selon les termes de la Licence Creative Commons Attribution - Pas d’Utilisation Commerciale - Pas de Modification 3.0 France.